Monday, November 24, 2014

My New EDC (Every Day Carry)


        I received my new EDC (Every Day Carry) bag today. I wanted a durable and practical bag that I could have travel with me on my day to day visits to clients. And since it is holiday time, I had to choose something on more of a budget, and so I found this little tactical molle compatible bag on eBay, and purchased it for only $15.00, which included shipping and handling! It is a sturdy little bag too. I would like to point out that the contents of my EDC bag will grow in time, but having only received it today, I wanted to give at least a basic idea of how one is packed.
        Before I detail my own packing ingredients, I would like to differentiate between an EDC, and a BOB (Bag, Bugout Bag), or a GHB (Get Home Bag). An EDC bag is a bag that you use to transport items that you use regularly, and allows you to be prepared for daily situations, and mini SHTF situations. It is not meant to replace a BOB or a GHB, rather it can be used to supplement those bags, but the primary purpose is to provide a smaller, day to day use option for a prepper, which allows you to reserve your BOB and GHB for more severe scenarios.
       A BOB is a bag designed to quickly grab and go, the contents providing the necessities for instant daily survival in extreme circumstances.
       A GHB is a bag, similar to the BOB, but it is one that is usually kept in a vehicle, and is designed for someone trapped away from home, who is also in an emergency situation, and provides them the resources needed for immediate survival and usually lasts an individual for a minimum of 72 hours.

My EDC Contents

         In the front pocket of my EDC, I packed a lighter, a book of matches, hand sanitizer, a moist towelette, a pack of toilet paper from a military MRE(Meal Ready to Eat), Chap Stick, and a pack of DayQuill pills.

         In the second/middle pocket of my EDC, I packed a write in the rain pad, two pens, my pocket journal, my contact solution, and a backup pair of glasses.

     In the main pouch of my EDC, I packed a pair of gloves, a crank flashlight, a back up phone/tablet charger, my Google Nexus 7, headphones, a box of pills, and though I didn't pack it inside the main pouch I attached it on the side, my Gerber Multi-Tool.


So there you have it, my EDC bag, as it is currently packed. You can see that the items within it are suited more for day to day use and mini SHTF scenarios. I will be continuing to add to it over time, like a water bottle and water bottle molle pouch.


Stay prepared, stay safe!

Monday, November 17, 2014

Most Common Bugout Vehicles


         Although the above image is one that many people imagine as an ideal bugout vehicle, this is for a minority of individuals with the financial resources and knowledge to purchase and maintain such a beastly mode of transportation. 
         Chances are you are like me, among the countless majority of preppers and survivalists that don't have the funds and/or the space for such bugout vehicle, so you are more likely to either already have or would like one of the following vehicles. I assembled this list of vehicles from taking pulls in a couple of chat rooms, as well as reviewing many of the images and blogs created by other preppers. I would be interested to recieve a vote from my readers on which of the following vehicles they feel would be the best prepping/bugout vehicle. let me know, and I will post the winning vehicle by Thanksgiving.


Ford Bronco

       The Ford Bronco is one of the more common vehicles I found that is used by not only preppers, but also hunters. It has the power and size to tow and transport supplies and preps, and can endure some harsh environments.

Toyota Land Cruiser

       The Toyota Land Cruiser, may be the most popular bugout vehicle I came across in all of my research. They are notorious for being not just powerful, but reliable. They are commonly found among preppers around the world, not just in the U.S.A.

Chevy Blazer

        The Chevy Blazer, is a common favorite among prepper families, as they usually come with plenty of room to transport a family of five, fairly comfortably. They are also among the most common bugout type SUV I find for sale.

Jeep Cherokee
        The Jeep Cherokee is probably the easiest to find bugout vehicle, at least in Utah, as I can find them for sale all the time, but they are also selling fast! They may be among the cheapest to buy and maintain, as you can run them into the ground, then build them back up again.

Trucks


        The reason that I do not specify any particular make or model of truck, is because I was never really able to find any one that was bragged about more than another for prepping reasons. It usually came down to the ever popular brand wars between Ford, Chevy, Dodge, and Toyota, but no real argument for bugging out.  It really seems to come down to preppers who prize SUV's or Pickups. 
         Trucks are good bugout vehicles for the obvious reason that they can be loaded and transport large and awkwardly shaped loads. They are also able to have campers already packed that can just be slid into them the moment you need to bugout, leaving it free for day to day use.


So, now that you have seen the list of common bugout vehicles, send me your vote on which one you think would make the best one:
Ford Bronco
Toyota Land Cruiser
Chevy Blazer
Jeep Cherokee
Pickup Trucks


Stay prepared, stay safe!


Thursday, November 13, 2014

Winterization Tips


       With the weather growing colder, I wanted to touch on some good ways to help winterize your home and property. Winterizing not only can save you a lot of money, but it will also extend the life of your home.
        Most of my tips I am passing along here, are taken from FEMA (Federal Emergency Management Agency), and their website: www.fema.gov

Insulation


        One of the best money saving steps that you can invest in for the winter is insulation. I just recently did this for my home for a ripping good deal, filling both sides of my attic, and noticed an immediate difference. This not only helps to keep the heat in your home throughout the cold months, lowering your heating bill, but it also helps to keep it cool during the warmer months too.
          Some good news about this process is that many gas and power companies will actually either pay for most of it, or, like in my situation, offer a mail in rebate. When all was said and done, I only ended up paying $99 for all of my attic to be re-insulated. I am now saving almost twice that a year. According to the men who came in installed the insulation you will usually only need to do it every 5-10 years. A great investment!

Caulking and Weather-Stripping

         Replacing and/or adding caulking and weather-stripping is a measure that I have also recently taken on my own home. This is a measure that you will do on doors and windows, preventing cold air to leak in and the warm to leak out. I used a putty knife, caulking and caulking gun, and a utility knife for trimming the weather-stripping, when I redid my doors and windows. You will want to be sure to remove any old caulking or weather-stripping prior to applying the new.
          There are a number of youtube videos that can give you a step by step tutorial on this.

Storm Windows and Plastic Covering

      Having an extra layer/buffer on your windows will improve the internal warmth of your home dramatically. The two most common way for doing this are storm windows and plastic. Storm windows are naturally the long term solution for your home, and can in some situations increase the value of the home. However, if you are like me, and have to be kind of choosy of which preps you do each month, then I would recommend using clear plastic. It can really be any type of large plastic sheeting, it's clarity does not seem to effect the warming effects, so I recommend getting as clear of plastic as you can, as to not limit either the sunlight, or attractiveness of your home. You can pull the plastic tight and flat enough that it is not immediately obvious.

Heating Equipment and Chimneys

        Few things are as nice in the winter as drinking a warm beverage while curled next to a crackling fire, or in a toasty room while looking out upon a frozen country side. For this reason I am greatly looking forward to putting my fireplace to good use this winter. However, prior to ever using it, or even using your heater, you should do a little bit of preventative maintenance on them. I actually just scheduled a chimney sweep to come and clean and inspect my chimney, and it only cost $119, and it is something that should be done at least once a year, if only for safety reasons.
         For your heater, a simple thing that you can do to help it run better and improve the overall quality of the air in your house is to simply change the filter. You can do this anywhere from $5-$25.
          You will also want to have all fuel burning and heating equipment vented and clear from clutter.
          I also recommend that you keep a fire extinguisher handy for emergencies.

Outdoor Winterization

        Winterizing the outside of your home can save you money by preventing damage to your home and property. One thing you should do every fall is to clean out your rain gutters, as this prevents moisture build up that can expand to damage your home and gutters when it freezes. You clean them in the fall, that way you can remove all of the fallen leaves and other debris from trees.
          You will also want to cut away any tree branches that could fall onto your house or other structures should they become overburdened by snow or ice. This is something that also is good to do for general storm protection.

Pipe Insulation

       You can also provide insulation for the pipes in your home. You can do this either by purchasing foam pipe insulation, as seen above, or FEMA recommends that you can wrap pipes in newspaper and plastic, though I think I would recommend the foam pipe covers, as I feel they are not only easier but safer.


Stay prepared, stay safe!

Thursday, October 30, 2014

How to make soap from ashes and fat.


          In a SHTF scenario, especially those of extended duration, keeping up your personal hygiene can mean the difference between life and death. If you are not keep you and your gear clean, then you are more susceptible to sickness, disease, and infection. In these scenarios you will be lucky to find some of the soap products in local stores as other will be needing them too.
           So why compete with others over the last few bars on the store shelves, when you can manufacture your own bulk supply as easy as you can make dinner for your family. Another plus of making your own  soap over store bought is, you can know exactly what is in the product that you will be using on you and your family. Home made soap is also customizable, in color, shape, and scent.The process I will be going into can be done in not just a kitchen, but out in most wildernesses as well.
             So, how do you make your own soap? The easiest way, and from complete scrap, is with hard wood and animal fat. The animal fat can be gathered from whatever scraps of meat and meat drippings you happen to have on hand. And it is the ashes of hard wood actually, as soft woods are too resinous to mix with fat. The lye within the ashes is the key ingredient taken from the hard wood ash. This is a technique that some of you may be familiar with, if you are frequent campers, as an old camping trick for cleaning cooking pans and pots is to throw some of your fires white ashes mixed with some of the cooking fat byproduct into a crude soap, good for ruff washing cook ware.
             The process I will be going over is an improvement to this "hard soap" technique, and will be a lesson on the making of "soft soap" bars, meant to be used for the cleaning of people and clothing.

Step One: Making Lye
 
            The above diagram is a very basic way to filter and procure lye, however, I am going to focus on how to make both lye and soap in a kitchen environment.
             First, you want to boil the hard wood ashes in a little soft water, rain water is usually best, for about thirty minutes. Next, allow the ashes to settle to the bottom of the pan. Next, you want to skim the liquid lye off of the top. This can be done daily until you have gathered enough of the weak solution, then start the soap making process by boiling the liquid down until it can float an egg.

WARNING: You do not want to use any aluminum pots, pans, or dishes for this process, as the lye will eat through and destroy them.

Step Two: Rendering Tallow or Lard

          You now want to place the meat fat, leftover cooking tallow/lard and vegetable oil, into a kettle, not to exceed the half full point, then heat it all until all of the liquid had been rendered out of the solid pieces. Then strain out the pieces, leaving only clean liquid.

Step Three: Bringing it all Together
             
         While the meat tallow/lard is still hot, you want to add it to the bubbling lye, and continue to boil the mixture, stirring it at regular intervals, until it reaches a thick mush.
          At this point you then can choose to either pour the mushy mixture into separate molds, or into one large dish, which you can cut up after it cools. You will want to cover the bottom of the dish or wooden box with either wax paper or grease, to prevent the soap from sticking.

        So this is how you make the most basic soft soap. Recipe amounts can vary on preference and resources. I would recommend that you tryout a few different mixture ratios until you find one to your liking.


Stay prepared, stay safe!


Monday, October 27, 2014

Ebola Signs, Symptoms, and Prevention


      With the growing fear of the spreading Ebola virus, I wanted to do a post that will provide signs, symptoms, and tips to prevent Ebola infection. Most of these tips are good information that can apply to most biological threats. Most of the information I will be presenting in this post was obtained primarily from the WebMD website.
     
Signs and Symptoms of Ebola

        Ebola causes bleeding inside and outside of the body. As it spreads through a body, it begins to destroy the immune system and internal organs, and causes blood-clotting cells to drop, which leads to uncontrollable bleeding. The most common symptoms of Ebola are:

-High Fever
-Headache
-Joint and Muscle Aches
-Sore Throat
-Weakness
-Stomach Pain
-Lack of Appetite

            These symptoms can show anywhere from 2 to 21 days after infection. Having such a long incubation time is one of the ways that it is able to spread so fast across large distances, as someone not knowing that they are infected could easily spread the infection while traveling. It is very difficult to determine if a person has Ebola from these symptoms alone, and doctors will usually  test for other diseases first, like cholera or malaria.

            One good thing to be aware of is that Ebola is not as contagious as more common viruses like colds, influenza, or measles. Additionally, you cannot contract Ebola from air, water, or food, and a person who has Ebola but has no symptoms can't spread the virus.
            Ebola can spread through skin contact, or by contact with bodily fluids, and this can happen from either humans or animals.
           
Treatment for Ebola
            Currently, there is no known cure for Ebola. The current treatment includes an experimental serum that destroys infected cells. The following is also a list of common ways doctors help manage Ebola symptoms:

-Fluids and Electrolytes
-Oxygen
-Blood Pressure Medication
-Blood Transfusions
-Treatment for Other Infections


Ebola Prevention Tips
         

           With no known cure, and with a 90% fatality rate, the best way to survive an Ebola infection is to prevent yourself from ever contracting it.
           The most powerful prevention tip is personal hygiene. There really is no better way to protect you, your family, and your pets. Wash your hands regularly, and before meals, and do not always trust the personal cleanliness of other people. I have seen well dressed and successful lawyers skip washing their hands after using the bathroom, and a drum circle hippy using hand sanitizer and refusing others the chance to use his drums. The point is that you never know.
           A simple thing you can do to improve your hygiene habits, is to by a few bottles of hand sanitizer, and spread them out throughout your house, car, and work. I carry some with me in my car and at work. Prior to and after meeting with my clients, I squirt a little in my hands and continue on with my day. I also like to use it after encountering well used surfaces in public places, like gas station card machines, store and restaurant counters, and gas pumps.
           Another simple thing you can do to better protect your home, is to regularly clean the various surfaces throughout your home with proper cleaning supplies. You also want to avoid using old sponges and rags.


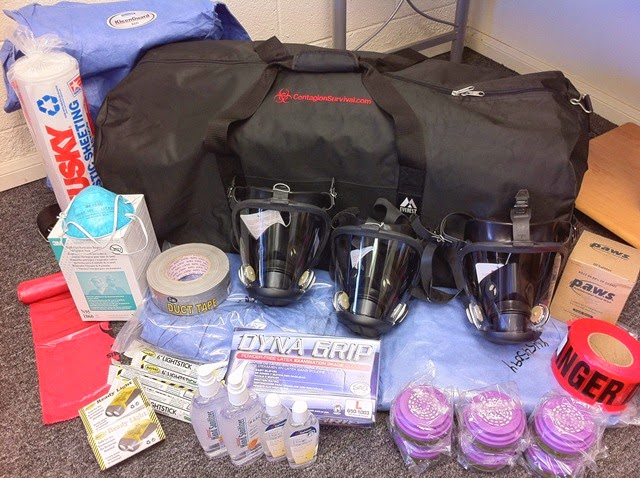
            Now if you are in a situation where you are more likely to come into contact or close proximity to others infected with Ebola, then medical professionals recommend that, first, you do not travel to areas where it can be found. But, again, if you are unable to avoid being in close proximity to those infected with Ebola, then you should make sure that you are wearing masks, gloves, and goggles whenever you are around people or animals who may have Ebola.

Stay Prepared, stay safe!


Friday, September 26, 2014

Bugout Plan and Practice


           Most preppers have developed a plan to survive a SHTF scenario, however, I am willing to wager that many of them have not actually practiced those plans. If you do not practice your plan, then it could very weel be one that looks good on paper but is either not practical, or, as much as it may be hard to admit, beyond your skills.
            The military has a saying that can be used to apply to SHTF planning, "Train how we fight, and fight how we train". This means, that if when you practice implementing your training, you try to do it in as real a way as possible, so that it will come naturally to you when it is the real deal.
             In this post I will be going over the importance of timed practice planning, arranged meeting sites, and supply stops.

Timed Practice Planning-
             Do you know how long it will take you to get your gear, and get to your various locations? I mean actually know. How about by foot, or in traffic? Is there more than one way you know how to get to the destination?
             These are all things that are important to know as part of your planning. It is easy to tell yourself or your prepping partners, that in an emergency situation you all should meet at location B before moving on to location C, however, you should perform timed practice runs, that take place during different times of day, and year. 
               For example, My wife and I have a planned set of secure locations that we can make our way too, in the event of an emergency. One of the locations, can take anywhere from five minutes, driving time, to almost twenty minutes, and that is within an hours time difference. Can you imagine if the roads were grid locked, or filled with accidents and rubble? 
                 For this reason I encourage you to run a timed practice run, and if possible, run a timed practice march, where you are carrying your bugout pack. If you do this while wearing a pedometer then you will be able to get a base line of how far you can walk with your gear in what time frame. It is a good piece of knowledge to have about yourself. I also encourage you to have more than one route to your destination, as one may be blocked off. 


Arranged Meeting Sites-


                Having a bugout point is great, and valuable, however, you may not have a property to retreat too, or your property is currently inaccessible, or your bugout location is a healthy distance away, having stepping stone sites and meeting locations can prove invaluable.
                It is also important that if you have others in your prepping group, everyone is very clear on the location meeting sites, and how long the group intends to stay at the site before moving on. You should also have a way of marking the site for late arrivals, letting them know that you were there, and where you are heading next. This could be as simple as drawing a tree to symbolize bugout cabin/property, or a word like "hunting" to relate a favorite camping location. However you mark the site, you want your loved ones to know what you mean, and those who did not prepare to not be able to track you via your markings.

Supply Stops-
         I cannot tell you how many times I have heard someone say that in the event of an emergency they are going to their nearest Wal-Mart or Army Navy store for supplies. Each time I hear it I always think "You and every other unprepared person in your city." As if that idea is original and unique to them. That is the very first thing anyone unprepared does in a SHTF scenario, hit up the stores until there is nothing left, then they try to survive off of scraps until help arrives to save them. 
         Those are the people that we prepare to defend against. I will not take food out of my loved ones mouths because someone was too foolish to plan ahead. 
Charles Darwin said
 "It is not the strongest of the species that survives, nor the most intelligent, but the one most responsive to change."
          In my opinion, the best alternative to planning on looting other locations, is to build your own supply, and encourage your friends and loved ones to do the same. That way you have built a network of multiple resource locations, accessible to you and your loved ones. All your eggs aren't in only one basket. The down side is, if others in your network are not carrying their weight with prepping, and relying too much on the group then they become a liability. Also, if you are a solo prepper then you don't have a network of people to rely upon, so other options to consider is maybe stocking a storage unit in between you and your bugout point with resources, or time capsule stashes (which is not advisable to do on property you do not own, as it could be discovered).


Stay prepared, stay safe!


Thursday, August 14, 2014

Communications When SHTF


         Most of my posts revolve around items and methods of immediate survival, this post, however, will be dealing with different forms of communication methods that are good to use in a SHTF scenario. And the most popular method of communication in a disaster is radio communication.
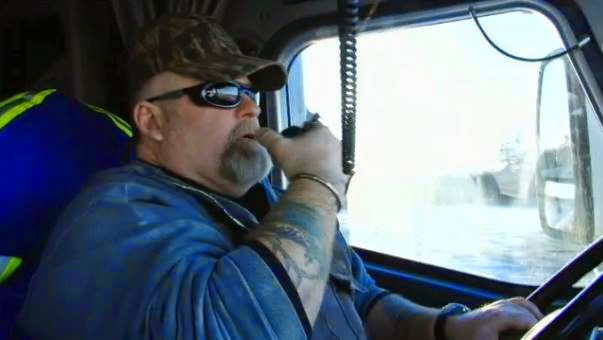
          Now when you think of radio communication, you may imagine something like the above picture, or that of the trucker below:

        However these are only small parts of the radio communication world. It has grown in technology, and it attracts not only preppers and survivalists, but an entire community of Amateur Radio enthusiasts.
         
        Now I am not claiming to be an experienced radio operator, but I am looking into setting up my own radio center, not only so that I can keep in contact with loved ones, and other members of my prepping team, but also so that I can monitor emergency broadcasts, and, if needs be, radio for help. I will not be dependent on anyone else for information gathering, and be able to be informed during a crisis.
        You do need to keep in mind that you will need to get a licence. US licenses are good for 10 years, and anyone may hold one, except for a representative of a foreign government. Within the US there are three different licence classes you can hold, technician, general, and extra.

Technician- 
         This is the most basic, and entry level licence for the amateur radio enthusiast. You only need to pass one examination of 35 questions on radio theory, regulations, and operating practices. This licence will grant access to all Amateur Radio frequencies above 30 megahertz. It will also allow for limited privileges on the HF, or "short wave" bands used for international communications.

General-
          This class of licence will grants operating privileges on all Amateur Radio bands and all operation modes. This licence will open up far more options for world wide communications. To earn the General class licence you must have first past the Technician exam, and then you must also pass a second 35 question exam that goes more in depth.

Extra-
           The Extra class licence will convey all operating privileges on all bands and all modes for US Amateur Radio. It is also the most difficult licence to earn, as it requires you to pass a very detailed 50 question exam, as well as having already passed the prior exams for the prior licence classes.

            Not every level will be best for everyone, and I can see how the Technician class licence would probably prove sufficient for the day to day prepper/survivalist. This would allow you to operate and use the traditional radios that you would find in many vehicles and trucks, such as the example below:


             The above type of radio would be an excellent basic method of back up communication to have on hand in a SHTF scenario, not to mention they can come in handy on a road trip/camp trip when convoying with friends or family.
              Having one of the above radios in your cars shouldn't stop you from having a set up of some kind at your home, perhaps having a little more of an elaborate set up. This could help provide a base of operations for you and your group. And it also can provide you will an option for being able to transmit a stronger signal.

                  Regardless of the set up that you choose to have, I would recommend that you look into this method of communication, as you may never know when being able to hear transmitted information can save your live. Just think, for example, if you are in a SHTF scenario and you are trying to escape from a dangerous environment, be it a city or town, a radio may allow you to hear if the escape rout you were planning on taking has been flooded, grid lock traffic, or even crosses into a contamination zone. With a radio you can also remain updated on rescue or relief efforts, or in the event of some kind of military occupation or attack, who, did it, what the response is going to be, and where the safest areas may be.

                  There are also a number of hand held radios that you may choose to invest in instead of the stronger radios above. These radios do not have the large range as those above, however, they are great for keeping in touch with your family and fellow preppers within your city. There price can range from as cheap as $25.00 to upwards of $1000.00, and as much as I hate to admit it, every forum and blog I have found on the subject states that the greater the price there is typically a better quality of signal and range. Regardless, I think that you can find something in the middle somewhere that doesn't set you back too far. Even if they are only used as back ups.


           The other option of radio information gathering doesn't need to have two way abilities, although they can come equipped with that option, are the emergency weather radios. These are radios that usually come with an alternative power methods, such as solar power or crank power, along with the option for batteries. These are good to have just so you can at least receive situation updates or broadcasts. Below are some examples.

 Stay prepared, stay safe!

Check out the following site for more information on this topic:

www.arrl.org


Thursday, August 7, 2014

Bugout Cheap, Bugout Green!


    So I have discussed bugging out to a home or property, but now I want to touch basis on different options that are available for building your home away from home, or even your actual home. Below are the top cheap, and green, methods I have found for building unique energy efficient homes or cabins.

Earthship

     As described by their web site:

"An Earthship is a building that will take care of you, while still being sustainable, affordable, strong and meeting your local building codes."

      Earthship's are homes built with natural and recycled materials. They are probably the most expensive building method I will be covering in this post, however it is still a great deal cheaper than other typical home building techniques, and you can get a better financial return of having a home that is almost entirely energy self sufficient. These homes are all equipped with solar panels and/or wind turbines. They come in a variety of designs and layouts, and you can even work with the designers to create your own custom plans. They are also built to meet standard building codes.
    Additionally, as you can see in the picture above, most Earthships come with some form of greenhouse/porch combo. A useful feature for preppers.

Earth Bag
    

      Earth bag building is a very cheap and very simple form of construction. It actually takes the earth from the building site, and fills it into long bags, varying in makes and material, and these bags can be shaped to build a wide variety of homes. You then coat them with plaster/stucco.They are more resistant to earthquakes, and maintain a more stable temperature throughout the year, cutting on heating and cooling costs.

Earth bag building can be shaped into a number of designs and sizes. You can also build them yourself with a little self education. This may be the cheapest method of building. Below are a couple more pictures of some size and design variations:


Cob House
       

        Lastly, the cob house. Now the cob house may take longer to make, and may be more labor intensive, but this is another do it yourself building style that when completed can look like something straight out of The Brothers Grimm books. The cob home may be one of the oldest building styles to still be used in the world today. It is a made of clay, sand, straw, and water, and many times you can use some of the material from the building site for ingredients. But just as with the earth bag building, you can fully customize your own home designs and build your home for much cheaper than a standardized homes, and it shares the same energy efficient strengths as earth bag building. Below are some pictures showing other options with cob building:


Stay prepared, stay safe!


Check out these sites for more information on these building methods.

www.earship.com

www.earthbagbuilding.com

www.thiscobhouse.com